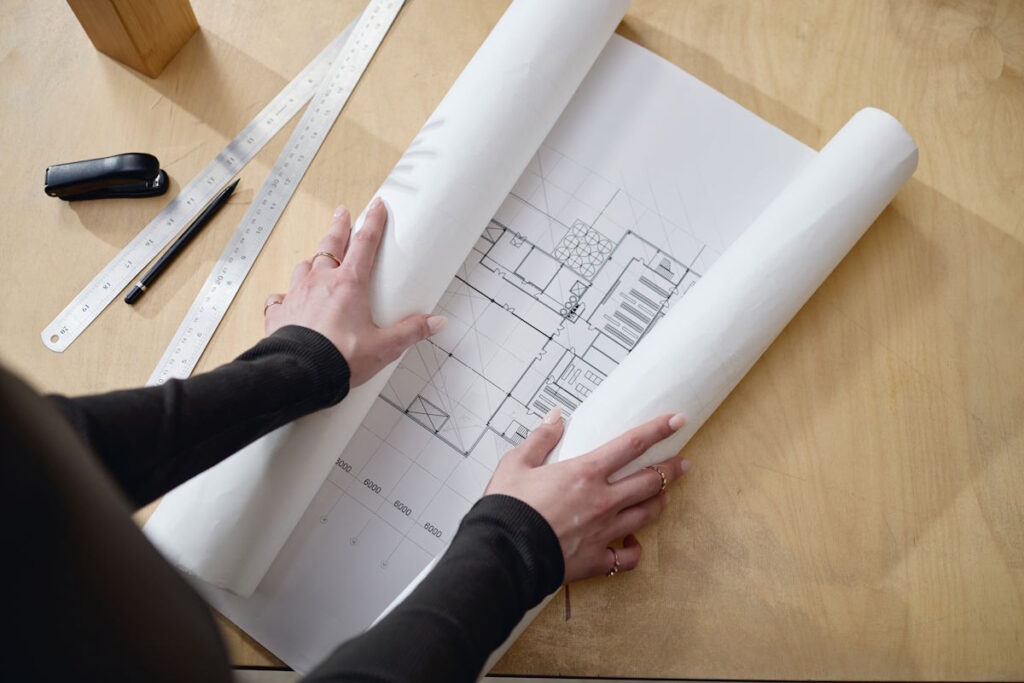
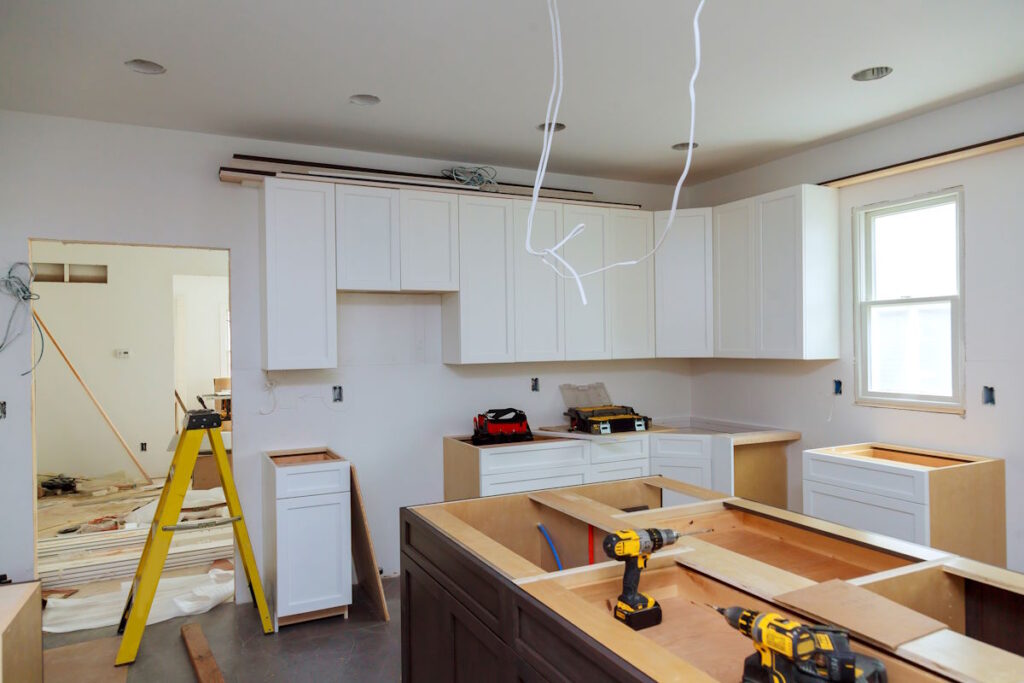
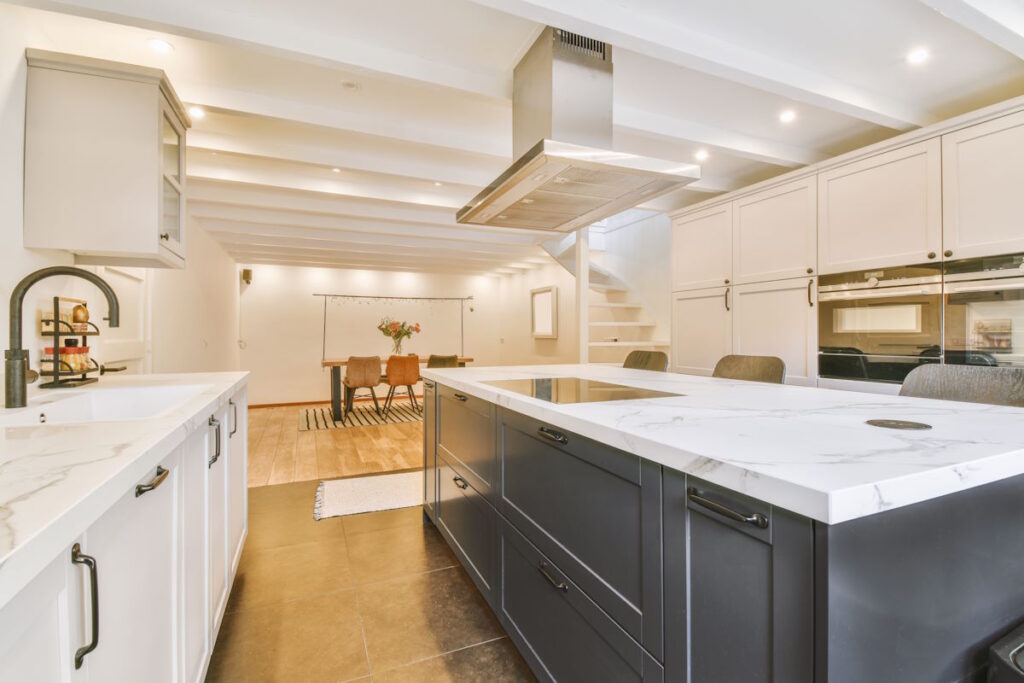
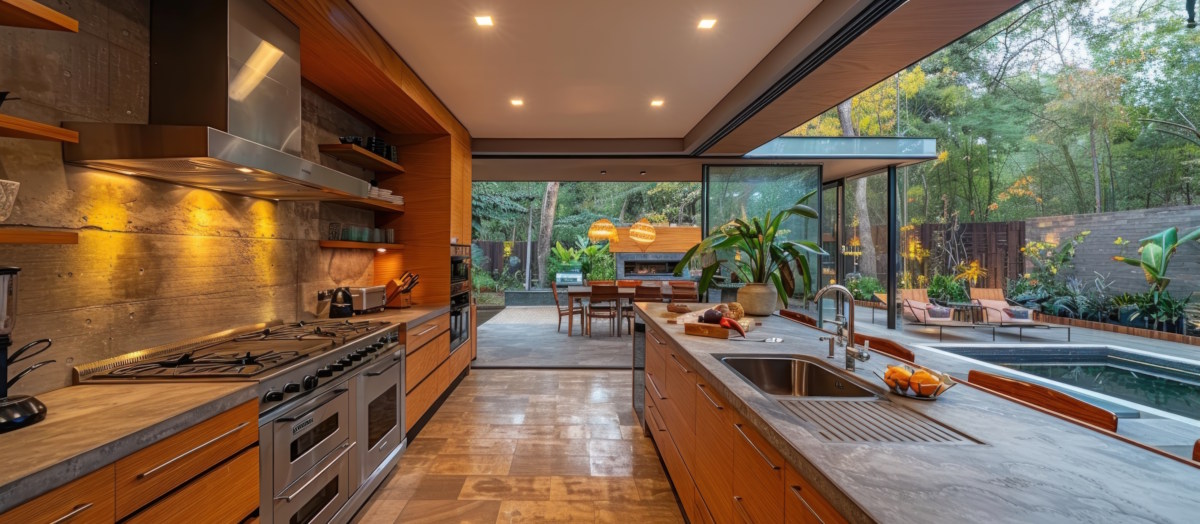
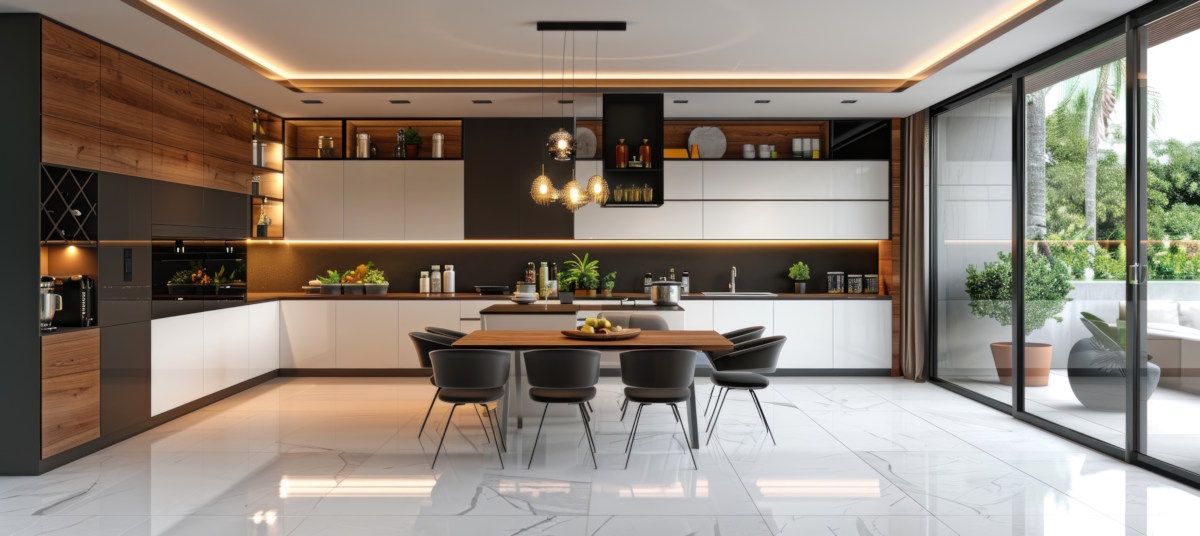
A kitchen renovation timeline starts well before the old cupboards are removed. Design decisions, site measurements, material selections, manufacturing, trade work and installation all need to happen in the correct order.
Understanding the process helps homeowners prepare for disruption and make decisions at the right time. It also explains why a reliable schedule can only be developed once the design, materials, appliances and project scope have been confirmed. A cabinet replacement and a complete renovation involving new services cannot be scheduled in the same way.
How does a kitchen renovation timeline work?
A kitchen renovation timeline has three phases: planning, manufacturing and site work. Each depends on the previous phase being completed.
Planning includes the consultation, measurements, layout, 3D design, selections and quotation. Manufacturing begins after the design and specifications are approved. Site work may involve removing the old kitchen, preparing the room, completing relevant trade work, installing cabinetry and fitting worktops.
Some activities can overlap, but others must follow a sequence. Service points must suit the layout, and certain worktops may need a final site measurement after the base cabinets have been fitted. The schedule should reflect the approved design, written scope, product availability and known site conditions.
Developing the design brief
The design stage starts with a discussion about how the current kitchen works and what needs to improve. Practical requirements should be settled before the project becomes focused on colours, handles and finishes.
The brief should consider:
Who uses the kitchen and how frequently they cook
Storage problems in the current room
Appliances that will be retained or replaced
Whether an island or seating area is required
Accessibility or mobility needs
The preferred design style
The available project budget
Accurate measurements are then used to develop the layout. The room must be assessed in relation to walls, windows, doors, floor levels, service points and fixed features. Older kitchens may hide uneven surfaces or unexpected plumbing routes, and some conditions only become visible after removal.
Jonathan Wolfe Kitchens uses colour 3D CAD designs so homeowners can assess the proposed layout, proportions and appearance before manufacturing begins. Clear decisions during design help establish a more reliable kitchen renovation timeline and reduce revisions later.
The design review moves the project towards a manufacturing plan. Changes should be resolved before production starts.
Homeowners may need to confirm:
Cabinet configuration and internal storage
Door style, material and colour
Worktop material
Sink and tap specifications
Appliance models and dimensions
Lighting and electrical requirements
Plumbing changes
Accessories included in the quotation
Appliance details matter because integrated and freestanding models have different dimensions, ventilation needs and connections. View material samples where possible, as screen colours and natural materials can vary.
The quotation should state what is included, excluded or still subject to confirmation. Where tiling, plumbing or electrical coordination forms part of the package, the written scope should identify the agreed work and responsible contractors. A planning estimate is not a formal quotation, and later changes may affect the cost and schedule.
How manufacturing fits the kitchen renovation timeline
Once the design, specifications and quotation have been approved, the cabinetry can move into production. A bespoke kitchen is manufactured for a particular room and layout rather than assembled from a standard set of units.
Production timing depends on the design, materials, workshop schedule and current product availability. Specialised fittings, accessories and surfaces may have separate ordering requirements. Appliance availability should also be checked because a substitute model may require different cabinet dimensions or ventilation.
This is an important part of the kitchen renovation timeline, although much of the work happens away from the home. Removing the old kitchen before the cabinetry and relevant materials are ready may simply increase the period without a working kitchen. Worktop fabrication may also require a final template after the base cabinets are installed and levelled.
Preparing your home for site work
Before work begins, the household needs a realistic plan for living without a fully functioning kitchen. A temporary area may include a kettle, microwave, small fridge and basic food-preparation space positioned away from dust and active work.
Homeowners should also:
Empty cupboards and remove fragile items
Confirm property access and parking arrangements
Make arrangements for children and pets
Confirm which appliances are being retained
Discuss possible water or electricity interruptions
If the project includes structural changes, homeowners should confirm whether municipal approval or professional input is required before work starts. The eThekwini Municipality building-plan guidance provides information about building applications, but requirements for a particular property should be confirmed with the municipality or an appropriately qualified professional.
What does the kitchen installation process include?
Site work generally starts with removing the existing cabinets, worktops and included finishes. Water damage, unsuitable wiring, damaged plaster, uneven floors or poorly positioned service points may then become visible. These conditions should be assessed before the new cabinetry is installed.
Plumbing and electrical changes must follow the approved layout. Cabinet installers may coordinate their work around these services, but regulated work must be completed and certified by appropriately registered people where required.
Did you know? South Africa’s Electrical Installation Regulations state that electrical installation work must be controlled by a registered person. If an addition or alteration is made to an installation with an existing certificate of compliance, a certificate must be obtained for at least the changed portion. The full requirements are available in the Department of Employment and Labour’s Electrical Installation Regulations.
Once the room and service points are ready, the cabinets can be positioned, levelled and secured. Installation may include:
Fitting base and wall cabinets
Installing tall units and pantry cupboards
Positioning appliance housings
Fitting doors, drawers and internal accessories
Preparing for worktop measurement or installation
Completing fillers, trims and finishing details
Custom cabinetry must work with the actual room, including small variations in walls and floors. Worktops are then fitted according to the selected material and fabrication process. The sink, tap, hob and appliances can be connected according to the written project scope.
View Jonathan Wolfe Kitchens’completed kitchen projectsfor examples of different layouts, materials and finishes.
What can affect the kitchen renovation timeline?
Most delays are linked to changing decisions, missing information, product availability or unexpected site conditions. Some can be reduced through planning, while others only become clear after work begins.
Common causes include:
Changing the layout after approval
Selecting appliances too late
Materials or products becoming unavailable
Unplanned plumbing or electrical work
Hidden damage behind existing cabinets
Additional work requested during installation
Dependencies between cabinetry, trades and worktops
A realistic kitchen renovation timeline should show the order in which activities need to happen. It should also allow for one delayed decision affecting several later stages.
Final checks and project handover
The final stage brings the cabinetry, worktops, appliances and services together. Doors and drawers should be adjusted, finishing details completed, and the kitchen reviewed against the approved design and quotation.
If plumbing work has been completed, ask which certification applies to the specific work. The Plumbing Industry Registration Board explains that a PIRB certificate of compliance is issued by a PIRB-licensed plumber for work completed under its requirements. Homeowners can also verify a PIRB plumbing certificate online.
Electrical additions or alterations should be inspected, tested and certified by a registered person where required. Keep relevant certificates and project documents for future reference.
The handover is also the time to ask how the selected materials should be cleaned and maintained. Care requirements differ, so follow the instructions supplied for the specific products used.
Plan your kitchen renovation with fewer surprises
A smoother renovation starts with a clear brief, accurate measurements and early decisions. Keep the approved drawings, quotation, appliance details, material selections, fitting schedule, written changes and relevant certificates together throughout the project.
Jonathan Wolfe Kitchens provides custom design, colour 3D CAD visualisation, manufacturing and installation. Coordinated tiling, plumbing and electrical work may also form part of a kitchen package where included in the written quotation.
If you are planning a new kitchen in Durban or elsewhere in KwaZulu-Natal, Jonathan Wolfe Kitchens can help you move from the first design discussion to a custom-manufactured kitchen and coordinated installation. A kitchen renovation timeline becomes far more useful once the design, products, trade requirements and written project scope have been confirmed.
FAQ
How long will the work take?
There is no standard timeframe for every project. The kitchen renovation timeline depends on the size and complexity of the kitchen, design revisions, custom manufacturing, material availability, worktop preparation and the amount of plumbing, electrical or building work required. Request a project-specific schedule once the design, quotation and major selections have been approved.
Should I move out while work is underway?
Many homeowners remain at home, but the right choice depends on the extent of the work and their tolerance for dust, noise and limited kitchen access. A temporary food-preparation area can make a contained renovation easier. Moving out may be more practical if the project affects several rooms or involves significant building work.
When should I choose my kitchen appliances?
Appliance models and accurate dimensions should be confirmed before the cabinetry design is approved. Integrated appliances, ovens, hobs, fridges and extractors may need particular cabinet sizes, ventilation spaces or service points. Confirm availability before relying on a specific model and coordinate purchasing and delivery with the kitchen company.
Can I change the design after approving it?
Changes may still be possible, but they can affect the quotation, manufacturing work and installation schedule. A small finish change and a major layout revision will have different consequences. Request the change in writing and wait for confirmation of the cost and timing implications before assuming it has been included.
Do I need approved building plans?
Replacing cabinetry and finishes does not automatically mean new building plans are required. Approval may be necessary if the project includes structural alterations, additions or other regulated work. Requirements depend on the property and proposed changes, so confirm them with the relevant municipality or an appropriately qualified building professional.
Who should complete the electrical and plumbing work?
Electrical installation work must be completed under the control of an appropriately registered person, with certification provided where required. Plumbing should be handled by a suitably qualified plumber, and homeowners should confirm whether a PIRB certificate applies. The quotation should distinguish cabinetry installation from regulated electrical and plumbing work.
Comparing kitchen companies in Durban should involve much more than placing three totals next to one another. A strong comparison looks at design quality, the detail behind each quotation, cabinet materials, hardware, installation standards, project management and after-sales support. Price still matters, but it only becomes useful when you know exactly what you are paying for.
This is especially important because two kitchens can look similar on a drawing while being very different in daily use. Storage access, door alignment, edge finishing, drawer hardware and the way plumbing or electrical changes are handled all affect the result. The best-value company is therefore the one that can deliver a practical, well-specified kitchen with a clear process and reliable support at a fair price.
Why the Cheapest Kitchen Quote Is Not Always the Best Value
A low quote is not automatically a poor quote, and a high quote is not proof of better quality. The problem is that kitchen quotations often include different assumptions. One supplier may include removal, disposal, installation, internal fittings and final adjustments, while another may price only the cabinets and worktops. The cheaper figure can rise quickly once missing items are added.
Before deciding, ask each company to explain its scope in plain language. A complete quotation should make it easy to see what is included, excluded and treated as an allowance. It should also state how variations will be approved and priced. This reduces the chance of comparing an all-inclusive proposal with a basic supply-only estimate.
Start Every Durban Kitchen Company With the Same Brief
You cannot make a fair comparison unless every company is responding to the same requirements. Prepare a simple brief before requesting quotations. It does not need to be technical, but it should describe the room, the people who use it, the problems you want to solve and the finish level you expect.
Give each shortlisted supplier the same information, including measurements or building plans where available. If a company recommends changing your brief, ask it to show why the change improves flow, storage, safety or cost. Good designers should be able to explain their thinking, not simply present a polished image.
Your brief should cover:
Layout needs: Note which walls, doors, windows and services are fixed and which may change.
Storage priorities: List items that need dedicated space, from groceries and cookware to cleaning products and small appliances.
Finish expectations: Define your preferred door style, colours, worktop type, handles and visible end panels.
Appliances: Provide model numbers where possible so openings, ventilation and electrical needs can be planned correctly.
Project boundaries: Confirm whether removal, plumbing, electrical work, tiling, painting and waste disposal must be included.
Timing: Share your ideal installation window and any immovable dates without treating an optimistic promise as a guarantee.
Compare Kitchen Companies in Durban Line by Line
Once the proposals arrive, compare specifications rather than totals. Look for the material used for cabinet boxes and doors, stated thicknesses, edge treatment, hinge and runner brands or performance ranges, worktop details, accessory quantities and installation labour. If a description says only “standard board” or “quality hardware”, request a precise specification.
Also check quantities. A proposal with more drawers, tall units, internal organisers, panels or specialist corner solutions may cost more because it contains more. Ask each company to revise unclear items before you score the quote. A supplier’s willingness to clarify details can also tell you something about how it communicates during a project.
Compare these details across every quotation:
Cabinet construction: Board type, thickness, backing, shelving and exposed-edge finish.
Doors and panels: Material, finish, profile, colour reference and treatment of end panels or fillers.
Hardware: Hinge and runner type, soft-close function, load suitability and warranty terms.
Labour: Delivery, fitting, removal, rubble disposal, site protection and final adjustments.
Exclusions: Appliances, sinks, taps, plumbing, electrical work, tiling, painting or municipal submissions.
Payment terms: Deposit, progress payments, final balance and how approved variations are charged.
Did you know? Two cabinet samples can look almost identical from the front while using different internal boards, edge sealing and hardware. Ask to inspect a full display unit, including the inside, back, hinges and drawer runners.
Test the Design Thinking, Not Just the 3D Render
A realistic render helps you picture the finished room, but it does not prove that the design will work. Ask the designer to walk you through the kitchen as if you were preparing a meal. Where will groceries be unpacked? Can the dishwasher open without blocking the main walkway? Is there landing space near the fridge and oven? Can two people use the kitchen without constantly crossing paths?
Strong kitchen companies in Durban should also respond to the actual property. They should measure carefully, check walls and floor levels, identify access constraints and consider how the existing plumbing and electrical points affect the plan. If the proposal requires service changes, the company should clearly identify who will do that work and what documentation or approvals may be needed.
Look for Evidence of Consistent Workmanship
A portfolio shows style, but you also need evidence of execution. Ask to see recent projects similar in size and finish to yours. Close-up photographs are more useful than wide glamour shots because they reveal joins, filler panels, worktop edges, door gaps and the treatment around appliances.
References are valuable when the questions are specific. Ask previous clients whether the final cost matched the approved scope, whether installers arrived when expected, how the company handled snags and whether it returned promptly for adjustments. If possible, visit a showroom or completed kitchen and operate the doors and drawers yourself.
Useful questions include:
Can you show me a recently completed kitchen with a similar layout or budget?
Who measured the room, and who takes responsibility if the measurements are wrong?
Are installers employees, regular subcontractors or arranged separately?
How are damaged components, alignment issues and outstanding snags recorded?
May I speak to two recent clients whose projects are fully complete?
Assess Project Management and Communication
Kitchen renovations involve several connected activities. Cabinet production may depend on final measurements, worktop templating may follow cabinet installation, and plumbing or electrical work may need to happen at specific stages. A credible company should explain the sequence, the expected duration and who coordinates each trade.
Pay attention to communication before you sign. Are appointments confirmed? Are revisions tracked? Does the company answer technical questions clearly? Early behaviour is not a guarantee, but it is useful evidence. You should know who your main contact will be, how progress will be reported and how delays or changes will be documented.
Look for the following:
Named contact: One person should take responsibility for communication and decisions.
Written programme: Key stages should be listed in a sensible order.
Variation process: No extra work should proceed without a written price and approval.
Site protection: The plan should cover dust, access, waste and protection of floors or adjacent rooms.
Handover process: Final inspection, snag completion, care guidance and warranty documents should be included.
Check Professional Standing and Compliance
Before paying a deposit, confirm the company’s registered name, physical address, contact details and trading history. The CIPC’s BizPortal provides a way to check South African enterprise information. Business registration alone does not prove workmanship, but it helps confirm that you know which legal entity is quoting and contracting with you.
Ask who will complete any electrical or plumbing changes and what compliance documents will be provided. South Africa’s Electrical Installation Regulations require a valid Certificate of Compliance for an electrical installation, and additions or alterations require appropriate certification.
For work that changes walls, openings or the building itself, ask the company or an appointed professional whether eThekwini building-plan processes apply before work begins. Requirements depend on the scope, so confirm them for your property instead of relying on assumptions.
Read the Warranty and After-Sales Terms
A useful warranty explains what is covered, for how long, who provides the remedy and what is excluded. Separate the company’s workmanship warranty from manufacturer warranties on hardware, worktops or appliances. Ask whether the company will manage a supplier claim or expect you to contact the manufacturer directly.
After-sales service matters because kitchens settle into use. Doors may need adjustment, a seal may need attention or a component may arrive with a fault. Ask how snags are logged, what response process applies and whether the final payment is linked to an agreed handover. Keep quotations, drawings, finish approvals, payment records and warranty documents together.
Use a Weighted Scorecard to Choose Overall Value
A scorecard prevents one impressive feature or one low total from dominating the decision. Score every shortlisted company against the same categories, then add notes to explain each result. The suggested weighting below totals 100 points and can be adjusted to match your priorities.
20 points: Clarity and completeness of materials, hardware and quotation specifications
20 points: Evidence of workmanship and quality from relevant completed projects
15 points: Design quality, ergonomics and response to your household’s needs
15 points: Project programme, communication and coordination of trades
10 points: Warranty, snag process and after-sales support
10 points: Professional standing, contract clarity and compliance planning
10 points: Total price and value for the agreed scope
Price remains part of the score, but it sits beside the factors that determine whether the kitchen is likely to be delivered well and perform over time. If two companies finish close together, revisit the biggest uncertainties. Ask for a final clarification rather than making a rushed decision.
Red Flags to Notice Before You Sign
No single warning sign automatically disqualifies a supplier, but several together should make you pause. A professional kitchen company should be comfortable putting important details in writing and allowing you enough time to understand the agreement.
Watch for:
A quotation with vague product descriptions or large unexplained allowances
Pressure to pay a large deposit immediately to secure an undefined discount
No final drawings, measurements or finish schedule attached to the agreement
Verbal promises that the company will not add to the written scope
No clear process for variations, delays, defects or snag completion
Reluctance to provide recent references or show detailed completed work
Unclear responsibility for plumbing, electrical work, approvals or site damage
Payment milestones that run well ahead of completed and verifiable work
Choose the Durban Kitchen Company That Reduces Uncertainty
The best comparison is not simply, “Which quote is cheapest?” It is, “Which company gives me the clearest, most credible path to the kitchen I need?” A detailed specification, thoughtful design, proven workmanship, realistic programme and accountable after-sales process all reduce uncertainty before installation starts.
When comparing kitchen companies in Durban, use price as one measure of value rather than the whole decision. Standardise your brief, compare every quote line by line, verify the team and process, and score the evidence. That approach gives you a stronger chance of choosing a kitchen partner whose work will still feel worthwhile long after the final payment.
Frequently Asked Questions
How many kitchen companies should I compare in Durban?
Three detailed proposals are usually enough to reveal differences in scope, specifications and service. More quotes can add noise if the brief keeps changing. Shortlist companies first, then give each one the same requirements.
What should a kitchen quotation include?
It should identify cabinet and door materials, hardware, worktops, quantities, labour, delivery, installation, exclusions, payment terms, expected timing and the process for variations. Drawings and a finish schedule should match the written quote.
Is the most expensive kitchen company always better?
No. A higher price may reflect stronger materials, more components or better service, but it can also reflect overheads or a different scope. Compare the evidence and specification before deciding whether the premium adds value.
Should I ask for a kitchen warranty in writing?
Yes. The warranty should distinguish between workmanship and product warranties, state the cover period and exclusions, and explain how faults or adjustments will be handled after installation.
When might approvals or compliance documents be needed?
Electrical additions or alterations require appropriate certification. Changes to walls, openings or the building may also trigger municipal building-plan requirements. Confirm the needs of your exact project with qualified professionals and eThekwini Municipality before work begins.
How can I tell whether a kitchen company is reliable?
Look for a traceable business identity, detailed proposals, relevant completed work, recent references, clear contracts, realistic timelines and a documented snag process. Consistent communication before the sale is another useful indicator.
Smart kitchen design is changing what people expect from a kitchen. It is no longer only about stone worktops, clean cabinetry, and premium finishes. It is also about how the room works every day. Good smart features can improve lighting, cooking, storage, comfort, and control, while still keeping the kitchen calm and elegant.
That balance matters. A luxury kitchen should not feel like a tech showroom. It should feel easy to live in. The lights should work when you need them. Appliances should save time. Charging points should be hidden. Storage should feel more useful, not more complicated. In many South African homes, especially in open-plan spaces across KZN, the kitchen is where cooking, family life, and entertaining all happen together. That makes smart kitchen design even more valuable.
Luxury should make daily life smoother. That is exactly where smart technology can help. The right features do not add noise to the room. They remove little frustrations that build up over time.
A smart luxury kitchen can help with:
better lighting for prep, dining, and entertaining
easier cooking with connected ovens or induction systems
cleaner worktops through hidden charging and power points
stronger energy awareness
better extraction and comfort in open-plan homes
improved convenience for busy households
The goal is simple: choose technology that adds real value. In other words, if it saves time, reduces clutter, improves comfort, or makes the kitchen easier to use, it is worth considering. If it only looks flashy, it probably is not.
That is why smart kitchen design works so well in bespoke kitchens. It is easier to build these features in properly from the start, instead of trying to force them into the space later.
Start with planning, not gadgets
One of the biggest mistakes in smart kitchen design is starting with devices before thinking about layout. In reality, the best smart kitchens begin with planning behind the walls.
Before any technology is chosen, think about:
where power points need to be
where appliances will sit
how lighting should be zoned
which areas need charging
where Wi-Fi signal might be weak
how the kitchen links to the rest of the house
This matters because even good technology feels messy when the planning is poor. You end up with visible cables, badly placed sockets, awkward controls, or appliances that interrupt the look of the room.
A luxury kitchen should feel intentional. That only happens when cabinetry, electrical work, lighting, and appliance planning are all working together.
Not every smart feature belongs in every kitchen. The best approach is to choose a small group of upgrades that improve daily life in a clear way.
1. Smart lighting
Lighting is one of the easiest and most effective ways to improve a kitchen. A single overhead light is rarely enough in a luxury space. Kitchens need layers of light.
A better setup may include:
task lighting for prep areas
softer lighting for evenings
feature lighting for shelving or glass cabinets
island lighting for dining and entertaining
Smart controls make this easier to manage. You can move from bright working light to softer evening light without changing the whole room manually. That helps the kitchen feel more polished and more flexible.
2. Connected cooking appliances
Smart ovens and induction systems can make everyday cooking simpler. For busy families, better timing and control can reduce stress. For people who enjoy cooking, they can improve consistency and make hosting easier.
Useful smart cooking features can include:
remote monitoring
better temperature control
pre-set cooking programs
timer alerts
improved safety controls
The important point is that the appliance should support the way you cook. It should not make the process harder.
3. Hidden charging and power
This is a small detail that makes a big difference. Luxury kitchens lose their clean look very quickly when chargers, cables, and small appliances take over the surfaces.
A better smart kitchen design may include:
charging drawers
hidden power inside breakfast cupboards
pop-up sockets in islands
under-cabinet power points in selected zones
These details help keep worktops clean and make the kitchen feel more refined.
4. Better extraction and comfort
In open-plan homes, extraction matters more than many people realise. Good extraction helps control steam, grease, and cooking smells, which is especially important when the kitchen opens into dining or living areas.
Smart extraction features can improve comfort without making the room feel industrial. In many cases, the best systems are the ones you notice the least.
Keep the look clean and timeless
The best smart kitchen design still looks beautiful when all the technology is turned off. That is a good rule to follow.
A luxury kitchen should still rely on strong design basics:
a good layout
quality joinery
balanced lighting
timeless finishes
clean lines
Technology should sit inside that framework, not dominate it.
This is why integrated appliances, concealed controls, and well-planned storage are so important. They help the kitchen feel modern without making it feel cold. Timber tones, matte finishes, stone surfaces, and soft lighting can all work beautifully with smart features when the balance is right.
Smart kitchen design for South African homes
In South Africa, kitchens often do more than one job. They are family spaces, prep spaces, entertainment spaces, and gathering points. That is especially true in KZN homes with open-plan layouts and strong indoor-outdoor living.
Because of that, smart kitchen design should respond to local lifestyle, not just trends.
In many homes, the kitchen needs to support:
family cooking during the week
relaxed meals around an island
guests moving through the space
connection to living and dining areas
a clean look even during busy use
That means the smart features should be practical. They should help the kitchen stay organised, comfortable, and easy to manage during real life, not only when the room is styled for photos.
These are good for background reading, but the design choices still need to fit your own home, layout, and lifestyle. Matter is described by the Connectivity Standards Alliance as a unifying IP-based connectivity protocol, and ENERGY STAR notes that connected appliances can add convenience and support efficiency.
Quick answers
What is smart kitchen design?
Smart kitchen design is the use of connected technology and better planning to improve how a kitchen works. It can include lighting, appliances, power, charging, extraction, and storage features.
Is smart technology worth it in a luxury kitchen?
Yes, if it makes daily life easier. The best smart features improve function, comfort, and cleanliness without making the room feel cluttered.
What should I add first?
For most homes, start with lighting, hidden charging, and one or two connected appliances. These usually make the biggest day-to-day difference.
Can smart kitchen design still feel timeless?
Yes. In fact, it should. The strongest luxury kitchens hide the technology inside a clean, well-designed space.
Conclusion
Smart kitchen design works best when it supports luxury instead of competing with it. The goal is not to fill the room with gadgets. The goal is to make the kitchen feel easier, calmer, and better suited to the way the household lives.
When planned properly, smart lighting improves mood, connected appliances save time, hidden charging reduces clutter, and better systems improve comfort. Together, these details help a luxury kitchen do more while still looking simple and timeless.
Lighting is one of the most underrated elements of kitchen design. The right lighting makes chopping vegetables safer, highlights beautiful cabinetry, sets the mood for dinner parties and can even impact your energy bills. Because kitchens serve many functions—cooking, homework, casual dining and socialising—you need more than a single overhead fixture.
A layered lighting approach combines ambient, task and accent lighting to create a functional and inviting space. This comprehensive kitchen lighting guide explains the role of each layer, offers practical tips on fixture selection and placement, and shows how lighting complements your kitchen’s layout and style. At Jonathan Wolfe Kitchens, we integrate lighting considerations into our bespoke designs, ensuring your kitchen is both beautiful and illuminated to perfection.
Why Kitchen Lighting Matters
Kitchens are high-activity zones where good lighting enhances both safety and enjoyment. Insufficient light makes chopping and cooking risky, while harsh light can create glare or unwanted shadows. The right lighting setup balances brightness with warmth, creating a space where you can both focus and relax.
Lighting also shapes atmosphere. Warm ambient light makes family dinners feel inviting, while bright task lighting helps when you’re reading recipes or supervising homework at the island. Think about how your kitchen serves different roles throughout the day—early-morning breakfast prep, after-school homework, late-night tea—and how lighting can adapt.
When planning a remodel, it’s important to evaluate natural light sources like windows and skylights. Then, consider how cabinetry, tall appliances, and finishes may cast shadows. Smart planning ensures you avoid dark corners and have flexible circuits that let you control the mood depending on activity.
Ambient lighting is the foundation of your kitchen’s illumination. It ensures the whole space is bright enough for safe movement and sets the general tone. Think of it as the “background light” that makes the room comfortable and usable.
In most kitchens, ambient light comes from ceiling-mounted fixtures such as recessed downlights, flush mounts, or LED panels. But wall sconces, pendants and natural light also contribute.
Tips for effective ambient lighting:
Even distribution: Position downlights evenly to eliminate shadows. Place them about 1.2–1.5 m apart, depending on ceiling height.
Use dimmers: Dimmers allow you to shift brightness from task-ready to relaxed dining mode.
Ceiling height matters: Higher ceilings require fixtures that direct light downwards; vaulted ceilings may benefit from pendant clusters.
Layer with natural light: Treat windows and skylights as part of your ambient plan. During the day, maximise daylight; at night, rely on dimmable fixtures.
A thoughtful ambient layer ensures the kitchen feels open and inviting—an essential first step before layering in task and accent lighting.
Task Lighting: Focus on Function
If ambient lighting is about setting the mood, task lighting is about getting work done. It directly illuminates work zones like countertops, sinks, cooktops and islands.
Key task lighting solutions:
Under-cabinet lights: LED strips or puck lights beneath cabinets brighten counters, eliminating shadows.
Pendant lights: Hung above islands or peninsulas, pendants focus light exactly where needed for food prep or dining.
Recessed spotlights: Angled downlights above the sink or hob give concentrated illumination.
Track lighting: Adjustable heads can highlight different work surfaces.
Integrated fixtures: Range hoods or open shelves often come with built-in lights for additional utility.
Design tips for task lighting:
Choose cooler colour temperatures (3 500–4 500 K) to keep you alert while chopping and cooking.
Separate switches let you use task lighting independently of ambient.
Ensure lights are placed in front of, not behind, the user to avoid casting shadows on worktops.
Accent lighting introduces a decorative layer, highlighting specific features or adding mood. While ambient and task lighting make your kitchen practical, accent lighting makes it memorable.
Popular accent lighting ideas:
Cabinet interior lights: Glass-front cabinets with LED strips showcase glassware or collectibles.
Toe-kick lighting: LED strips at the base of cabinetry add a soft floor glow, great for night use.
Statement pendants: Sculptural pendants over islands double as accent and task lights.
Cove lighting: Concealed LEDs in ceiling recesses or above cabinetry wash walls in soft light.
Backlit splashbacks: Lighting behind textured or glass splashbacks creates a striking focal point.
Accent lights should be controlled separately. Switch them on for entertaining, or off when only practical illumination is needed.
Layering Your Lights for a Balanced Kitchen
The best-lit kitchens combine all three layers—ambient, task and accent—into a versatile system.
How to layer successfully:
Plan circuits smartly: Keep each lighting type on its own switch or dimmer.
Consider scenes: Create pre-set combinations—for example, “Cooking Mode” (bright task + ambient) and “Dinner Mode” (dimmed ambient + accent).
Blend colour temperatures: Warm light (2 700–3 000 K) for ambience; cool light (3 500–4 500 K) for tasks.
Cohesive style: Match finishes and forms so pendants, downlights and strips feel unified.
Test before finalising: At night, test brightness, shadows, and reflections to ensure balance.
Layering turns your kitchen from purely functional into a space that adapts seamlessly to your lifestyle.
Choosing Fixtures and Bulbs
Fixtures are not just about looks—they determine the quality of light, efficiency and maintenance.
Considerations when choosing:
Energy efficiency: LEDs save money and last 10–20 times longer than incandescent bulbs.
CRI (Colour Rendering Index): Choose bulbs with CRI 90+ so food and finishes look natural.
Style and finish: Coordinate fixture metals with taps and cabinet hardware for a cohesive look.
Size and scale: Match fixture size to your space—large pendants suit big islands, while slim fixtures work in compact kitchens.
Smart controls: App-based or voice-activated controls allow scheduling, dimming and colour adjustments.
With the right combination, fixtures become design elements in their own right.
Natural Light and Energy Efficiency
Never underestimate natural light. Positioning sinks beneath windows or enlarging openings can dramatically improve ambience. Skylights are a fantastic way to brighten dark kitchens, especially in open-plan homes.
Pair natural light with reflective surfaces—like glossy tiles, polished stone or light cabinetry—that bounce daylight deeper into the room. Use window treatments that allow control without blocking illumination.
Energy efficiency goes hand in hand with smart planning. LEDs consume less energy and produce less heat, reducing the need for ventilation. Combining natural and artificial lighting reduces electricity bills while enhancing comfort.
Conclusion
Lighting is more than just illumination—it’s a design element that defines your kitchen’s atmosphere, safety and efficiency. By combining ambient, task and accent lighting, choosing the right fixtures and maximising natural light, you can create a kitchen that is not only functional but also beautiful.
At Jonathan Wolfe Kitchens, we design kitchens where cabinetry, appliances and lighting work together seamlessly. From consultation to installation, we ensure your lighting plan enhances both the look and feel of your space.
The layout of your kitchen is the foundation upon which everything else—cabinets, appliances, worktops and lighting—is built. A well-planned layout not only makes food preparation easier but also affects how you entertain, how much storage you have and how your kitchen connects with surrounding rooms.
For homeowners considering a renovation or starting from scratch, navigating the many options can be overwhelming. Should you choose the classic U-shaped design, the versatile L-shape or something more compact like a galley? This guide demystifies the most common layouts and helps you decide which one suits your home and lifestyle.
Throughout the article you’ll find practical tips, examples, pros and cons, and inspiration to turn your kitchen into a functional and beautiful space. And if you need help bringing your vision to life, Jonathan Wolfe Kitchens offers bespoke design and installation services that can be explored at: https://jonathanwolfekitchens.co.za/kitchens/
Understanding the Work Triangle and Flow
Before diving into specific layouts, it’s important to understand the concept of the kitchen work triangle. This design principle places the three main work areas—the stove, sink and refrigerator—at efficient distances from one another, minimising unnecessary steps.
A well-executed triangle improves workflow, reduces clutter and makes cooking more enjoyable. When evaluating different kitchen layouts, consider how each design supports or challenges this triangle. For example, U-shaped and L-shaped kitchens naturally support the triangle by placing appliances on different walls, while single-wall layouts compress all functions into a linear setup.
Balance is key: too tight a triangle can feel cramped, while an overly spread out one increases walking distance. Keep your family’s cooking habits, the number of people using the kitchen at once and any specialised zones—baking stations, breakfast bars or homework areas—in mind when choosing a layout.
U-Shaped Kitchen Layout
The U-shaped (or horseshoe) kitchen is a classic design where counters and cabinetry run along three walls, forming a “U” open to an adjacent space. This layout provides ample counter space and storage options, making it ideal for people who cook frequently or entertain.
The U-shape naturally supports an efficient work triangle, with the stove, sink and refrigerator placed on separate walls for easy movement. Because cabinets line three walls, storage capacity is generous; there’s space for deep drawers, pull-outs and open shelving. This configuration is also suitable for multiple cooks—families or avid entertainers can work simultaneously without bumping into each other.
Benefits and Considerations
Efficiency: With three walls of countertop, you can dedicate zones for prepping, cooking and clean-up.
Storage: Continuous cabinetry allows for custom solutions such as corner carousels, pull-out spice racks and built-in recycling centres.
Multiple functions: Works well with an island or peninsula as an additional prep area or breakfast bar.
Space requirements: Best for medium to large rooms. Small kitchens may feel closed in with this design unless you incorporate open shelving or pass-through windows.
An extension of the U-shape is the G-shaped layout, which features a partial fourth wall or peninsula that forms a “G.” This configuration offers additional counter space for food preparation and entertaining.
The peninsula can function as a breakfast bar, extra storage or a landing zone for serving dishes. It also defines the kitchen’s boundaries within an open-plan home while maintaining sightlines to living or dining areas.
Even if you don’t need a full G-shape, adding a peninsula to any layout can be a smart solution. It acts as a bridge between the kitchen and surrounding areas, promoting conversation while cooking and offering versatile usage—meal prep, serving space, homework station.
When considering a peninsula, ensure there is at least 90 cm of clearance for people to move comfortably around it.
L-Shaped Kitchen Layout
The L-shaped kitchen is celebrated for its versatility and ability to fit rooms of all sizes. This layout consists of two perpendicular legs that form an “L,” creating a natural corner that can house the sink or stove.
The L-shape provides an ergonomic workflow that minimises steps and allows for an efficient work triangle. It also maximises corner space with solutions like lazy Susans or pull-outs, making hard-to-reach areas more usable.
Why choose an L-shape?
Flexibility: Allocate the longer wall for appliances and the shorter wall for prep or storage.
Open feel: Two walls instead of three create a lighter, more spacious look.
Multiple layouts: Great for placing sinks under windows, open shelving on feature walls, and works well in open-plan homes.
In small apartments, studios or minimalist homes, a single-wall (or one-wall) kitchen offers simplicity and efficiency. All cabinets, appliances and work surfaces align along a single wall. This saves space while creating a sleek, cohesive look.
Design Tips:
Use vertical storage with tall cabinets or pantry towers.
Group appliances in a logical order (fridge → sink → cooktop).
If space allows, add a parallel island or dining table to provide extra surface and social space.
The galley kitchen features two parallel runs of cabinets and countertops, creating a corridor for movement. Compact and efficient, this design is ideal for small homes or apartments.
It promotes workflow by keeping all functions within reach. Often the sink is placed opposite the stove, allowing easy back-and-forth cooking. Vertical storage and ceiling-height cabinets make the most of limited space.
To avoid a cramped feel, lighting is key: under-cabinet lights, pendants, and reflective surfaces help make the corridor brighter and more open.
Peninsula and Island Additions
Peninsulas and islands deserve their own mention because they can enhance several kitchen layouts.
Peninsula: Extends from a wall, adding counter space, storage and seating, while also helping define zones in open-plan homes.
Island: A freestanding unit that provides extra prep area, integrates appliances, or doubles as a dining spot.
Both options bring flexibility, social interaction, and additional storage opportunities, especially in medium to large kitchens.
Choosing the Right Layout for Your Home and Lifestyle
Selecting a kitchen layout is about more than aesthetics. Think about:
Room size and shape: A compact apartment may suit a single-wall or galley, while larger homes can support U-shapes or islands.
Cooking habits: Do you cook solo, with family, or host frequently?
Household use: Will kids use the kitchen for homework? Do you want open flow or separation from living areas?
Storage needs: More wall space = more cabinetry.
Jonathan Wolfe Kitchens’ Approach to Custom Layouts
At Jonathan Wolfe Kitchens, we believe that every kitchen should reflect its owner’s personality and lifestyle.
Our bespoke process starts with a consultation about your cooking habits, storage requirements, and design preferences. From there, we create a tailored layout that maximises workflow, storage, and aesthetics.
We also offer coordinated built-in cupboards, bathroom vanities, and more—so your entire home reflects a unified style.
Choosing the right kitchen layout is the first and perhaps most important step in creating your dream cooking space. By weighing the pros and cons of U-shaped, G-shaped, L-shaped, single-wall, galley and peninsula designs, you can select a layout that works beautifully for your space and lifestyle.
When you’re ready to take the next step, Jonathan Wolfe Kitchens is here to help design and install a bespoke kitchen tailored just for you.
The kitchen island has become a defining feature of the modern home design, not just a trend, but a functional, stylish and versatile addition to any kitchen. In South Africa, where kitchens are increasingly doubling as social spaces for family gatherings and entertaining, a well-designed island can add immense value to your daily life and your property. But functionality is key.
At Jonathan Wolfe Kitchens, we understand that no two homes or families are the same. Whether you’re building from scratch or renovating an existing kitchen, here’s how to approach the design of your island to ensure it delivers on performance as well as aesthetics.
Start with Purpose: What Will You Use Your Island For?
Before diving into shapes, sizes and finishes, it’s important to define what function your kitchen island will serve. The answer depends largely on your household’s lifestyle.
Need more prep space? You’ll want a durable work surface and plenty of under-counter storage.
Love entertaining? Consider adding bar seating and integrating a drinks fridge.
Cooking hub? Plan for hob installation, power points, and possibly an extractor.
Family-focused? You might use your island as a breakfast bar, homework station or even a casual dining spot.
Clarifying your priorities early will inform every design decision to follow.
Find the Right Size and Position
The island should serve the space, not crowd it. In South African homes where kitchen sizes vary widely, getting proportions right is essential.
As a general rule:
Allow at least 1 metre of clearance on all sides for smooth movement around the island.
Islands typically range between 900 mm and 1.2 metres deep, and between 1.5 to 2.5 metres long, depending on available space.
In open-plan kitchens, align your island to create flow between cooking, dining and living zones. It should complement, not compete with, the room’s natural layout.
A good installer will provide a 3D CAD rendering, like we do at Jonathan Wolfe Kitchens, so you can visualise proportions and make adjustments before fabrication.
Choose a Practical Worktop
The worktop material needs to balance beauty with durability, especially if the island will see heavy use.
Popular choices include:
Caesarstone: A premium quartz surface, non-porous and resistant to stains, ideal for a sleek, low-maintenance island.
Granite: A timeless option in South Africa, appreciated for its natural patterning and heat resistance.
Solid wood: Brings warmth to a space, though it requires more upkeep.
If you’re mixing surfaces – for example, stone on the island and laminate elsewhere – choose complementary colours and textures to tie everything together.
Plan Your Storage Smartly
Don’t underestimate the storage potential an island can offer. Depending on the design, you might include:
Deep drawers for pots and pans
Pull-out spice racks
Hidden recycling bins
Open shelving for display items or cookbooks
Cupboards on both sides for symmetrical utility
You can even incorporate clever features like charging stations or child-proof cabinets, depending on your household needs.
At Jonathan Wolfe Kitchens, we help clients maximise every centimetre of usable storage without compromising the island’s clean design.
Add Seating for Versatility
One of the main attractions of a kitchen island is the ability to add informal seating. Bar stools are great for quick meals, conversations during cooking, or a place for guests to gather while you work.
Tips for comfort and function:
Allow at least 600 mm width per stool, and around 30 cm of knee clearance beneath the counter.
A 900 mm–high worktop works with standard bar stools; for lower stools, consider a dropped or tiered section.
Leave at least 1 metre between the seated side of the island and any adjacent wall or cabinetry.
If space permits, a cantilevered or overhanging counter provides a cleaner look with fewer supports.
Incorporate Appliances or Plumbing (if needed)
Islands can be purely surface-based, or become fully operational work zones by integrating:
A hob or cooktop
Sink with tap
Dishwasher or wine fridge
Power sockets for appliances or USB charging
Note that adding services like plumbing or gas to an island will increase costs and complexity, especially in renovations. Always consult a professional for safe, compliant installation, our experienced team is on hand to guide you through the process.
Style to Suit Your Space
Finally, your island should feel like a natural extension of your kitchen design. Whether you prefer modern minimalism, classic shaker-style, or bold contemporary finishes, there are endless ways to customise:
Contrasting colours: Try navy base units with white quartz tops for drama.
Handleless drawers: Perfect for sleek, contemporary kitchens.
Pendant lighting: Adds both style and task lighting.
Feature panels or cladding: Woodgrain, fluted surfaces or textured laminates can introduce warmth and personality.
Take inspiration from your existing cabinetry, flooring and walls, or let the island become a stand-out feature.
Final Thoughts
Designing a kitchen island is about more than just adding a stylish feature. When thoughtfully planned, it becomes the heart of the home. A central hub where cooking, eating, working and relaxing happen in harmony.
At Jonathan Wolfe Kitchens, we’ve been crafting bespoke kitchens in KwaZulu-Natal since 1990. Our team combines expert design, CAD modelling, and quality materials to ensure your kitchen, and its island, is as functional as it is beautiful.
Ready to start planning your perfect island?Contact us today.
To provide the best experiences, we use technologies like cookies to store and/or access device information. Consenting to these technologies will allow us to process data such as browsing behavior or unique IDs on this site. Not consenting or withdrawing consent, may adversely affect certain features and functions.
Functional
Always active
The technical storage or access is strictly necessary for the legitimate purpose of enabling the use of a specific service explicitly requested by the subscriber or user, or for the sole purpose of carrying out the transmission of a communication over an electronic communications network.
Preferences
The technical storage or access is necessary for the legitimate purpose of storing preferences that are not requested by the subscriber or user.
Statistics
The technical storage or access that is used exclusively for statistical purposes.The technical storage or access that is used exclusively for anonymous statistical purposes. Without a subpoena, voluntary compliance on the part of your Internet Service Provider, or additional records from a third party, information stored or retrieved for this purpose alone cannot usually be used to identify you.
Marketing
The technical storage or access is required to create user profiles to send advertising, or to track the user on a website or across several websites for similar marketing purposes.